How to use the Pathfinder Tool!
A new Rooms 2.0 tool that provides an easier way to control and define paths for your objects and characters in your rooms.
We've seen countless examples of how creatively our players can make objects move from point A to point B. A common solution in the past has been to clamp things to our quest enemies from the legacy Spawner tool, and we’ve even seen creators implement their own pathfinding algorithms entirely in CV2! Getting things to move around a room shouldn’t require custom clever solutions though, and when we started developing My Little Monsters we felt that this was a key tool missing for creators.This led us to implement the Pathfinder component, which is a new tool available exclusively in Rooms 2.0 that lets your creations navigate around a room’s baked navmesh. The Pathfinder is what’s used to allow your monster to run around the map in My Little Monsters, and we’re glad to be able to finally give this tool to all of you too!
Fast Facts
- Setting Up Your Room for the Pathfinder: Learn how to configure your room and navmesh for effective pathfinding.
- Using the Pathfinder: Discover how to set and customize paths for objects and characters with the Pathfinder.
- Ground Clamping: Understand how Ground Clamping aligns paths with the ground for realistic movement.
- Navmesh Holes for Dynamic Obstacles (only available in Rec Room Studio): How to use Navmesh Holes to prevent objects from going through a specific area in complex room designs.
Setting Up Your Room for the Pathfinder
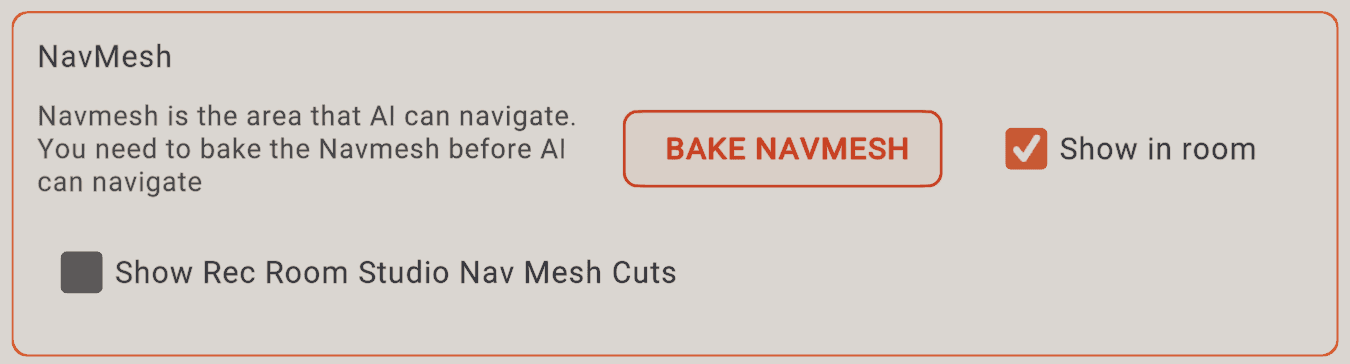
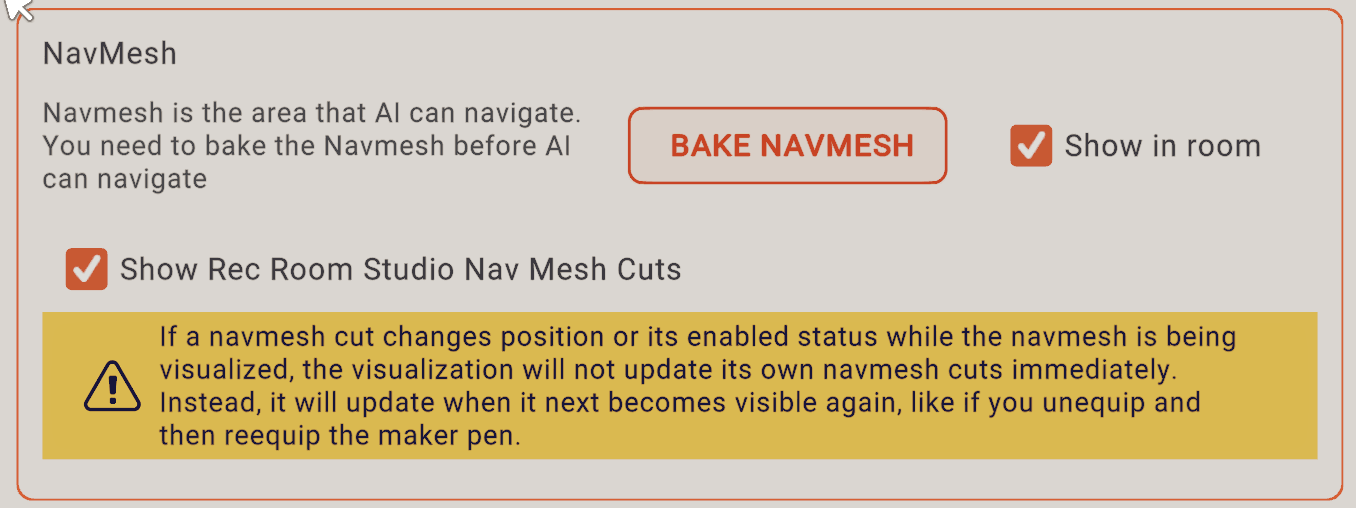
The Pathfinder is only available in 2.0 Rooms, so you’ll need to make sure you’re in one if you want to try it out (how-to-guide here if you need it).Once in a 2.0 Room, the first thing you’ll need to do is bake the navmesh in your room. A navmesh is a way of telling the pathfinder where it can and can’t go.While in the room, go to Room Settings by pressing the Settings button on the This Room page of your watch. Scroll down far enough and you’ll see the settings pictured below. Press the “BAKE NAVMESH” button to bake a navmesh in your room.
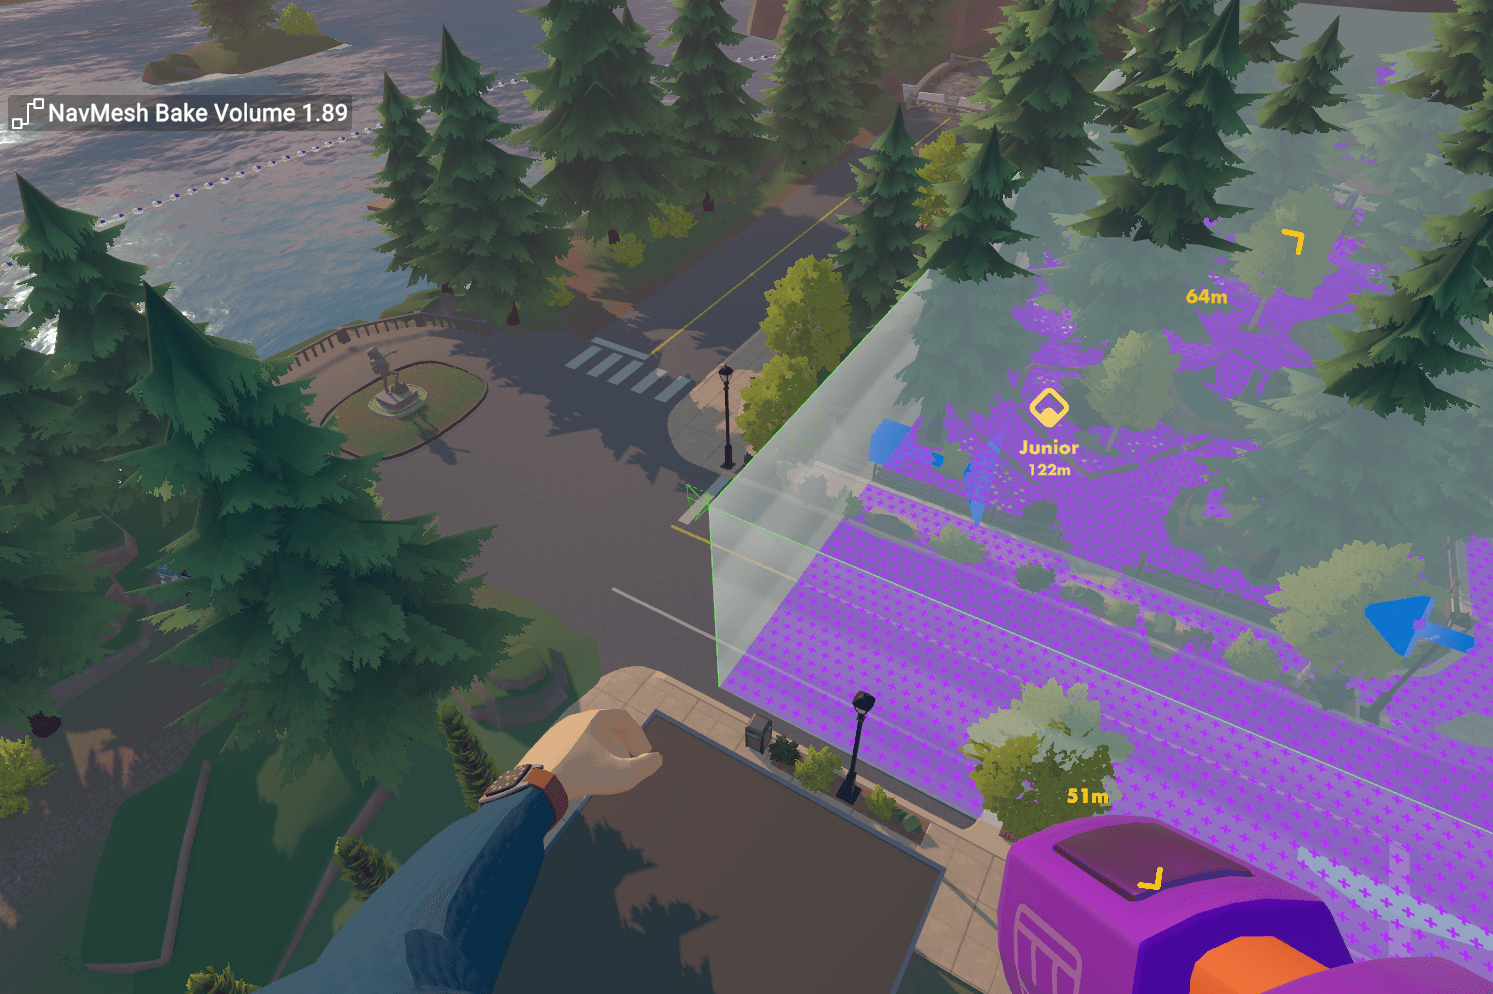
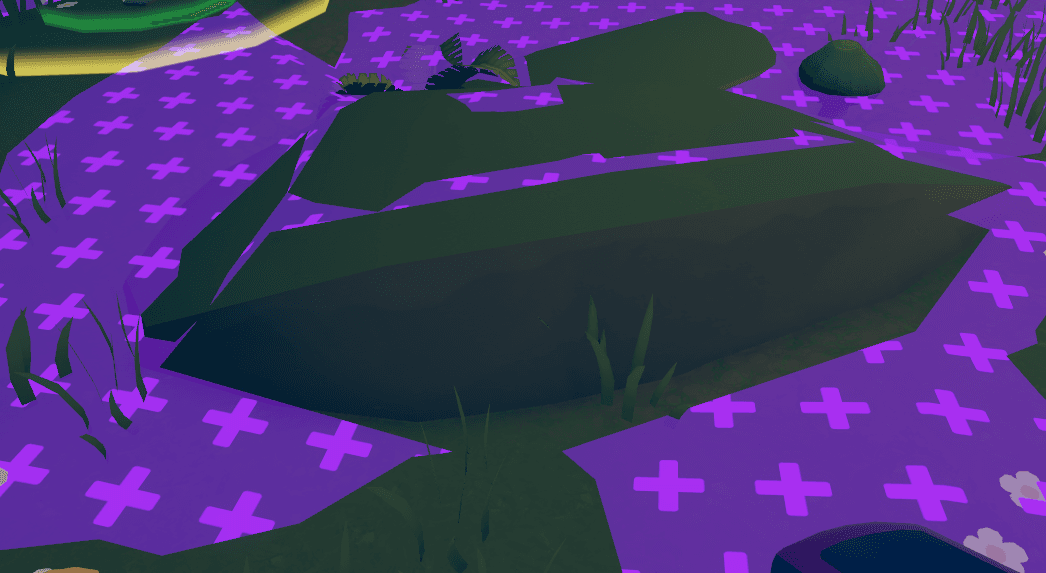
This will trigger a process that will take a few seconds. Once it finishes, if “Show in room” is enabled, pull out your maker pen and you’ll see a purple layer on the ground–this represents the room’s navmesh. The purple layer shows exactly where the Pathfinder is able to path to.The navmesh is an approximation of the terrain and not an exact match. For that reason, note that you may encounter areas like the bottom left corner of the below screenshot, where the navmesh is actually below the terrain, so you won’t see the navmesh visualized there from above ground but it is indeed there.
There’s also a concept of Navmesh “Islands” - sections of the navmesh unreachable from other areas of the navmesh. For example, in the above picture, the navmesh from the ground does not actually connect to the navmesh on top of the rocks. To check if any two points on the navmesh can reach each other, you may use the Navmesh Can Path Between chip. This chip can be useful for determining if a spot is even reachable before telling the Pathfinder to navigate to it.When you bake the navmesh, you should also see a giant box appear. This is the Navmesh Bake Volume. This controls where the navmesh is able to bake - for example, if you set it up like the below screenshot, it would prevent pathfinders from navigating outside of that area. If the navmesh that was generated is too big or too small, you can adjust this volume and then bake the navmesh again. You are free to delete this object when you’re not using it and the navmesh itself will stick around. If you delete it, it will be regenerated the next time you bake the navmesh in your room.
Using the Pathfinder
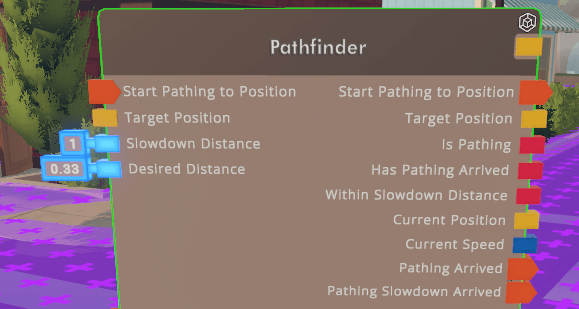
Once you have a navmesh set up, getting the Pathfinder running is simple.Pass in a Target Position and then run Start Pathing to Position. Once the Pathfinder gets within Slowdown Distance of the Target Position, it will begin gradually slowing down so that it doesn’t stop suddenly. The Pathfinder will automatically stop pathing once it gets within Desired Distance of the Target Position. You can tweak the speed and acceleration either in the config menu, with the built-in Apply Settings port, or with chips like Pathfinder Set Max Linear Speed.
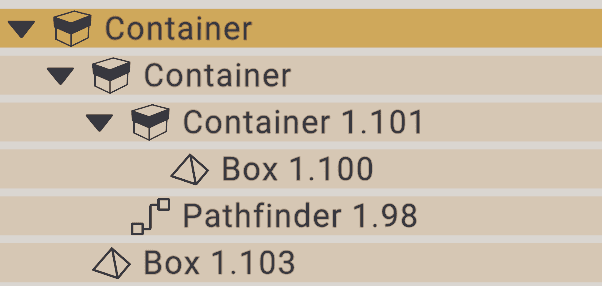
The pathfinder itself is invisible when not holding the maker pen, so in order to give it visuals you’ll probably want to parent something else into it using the Connect tool. A pathfinder inside of a Rooms 2.0 Hierarchy will drive its entire hierarchy starting from its root Container. In the below screenshot, the Pathfinder and both Box objects will all move together.
Ground Clamping
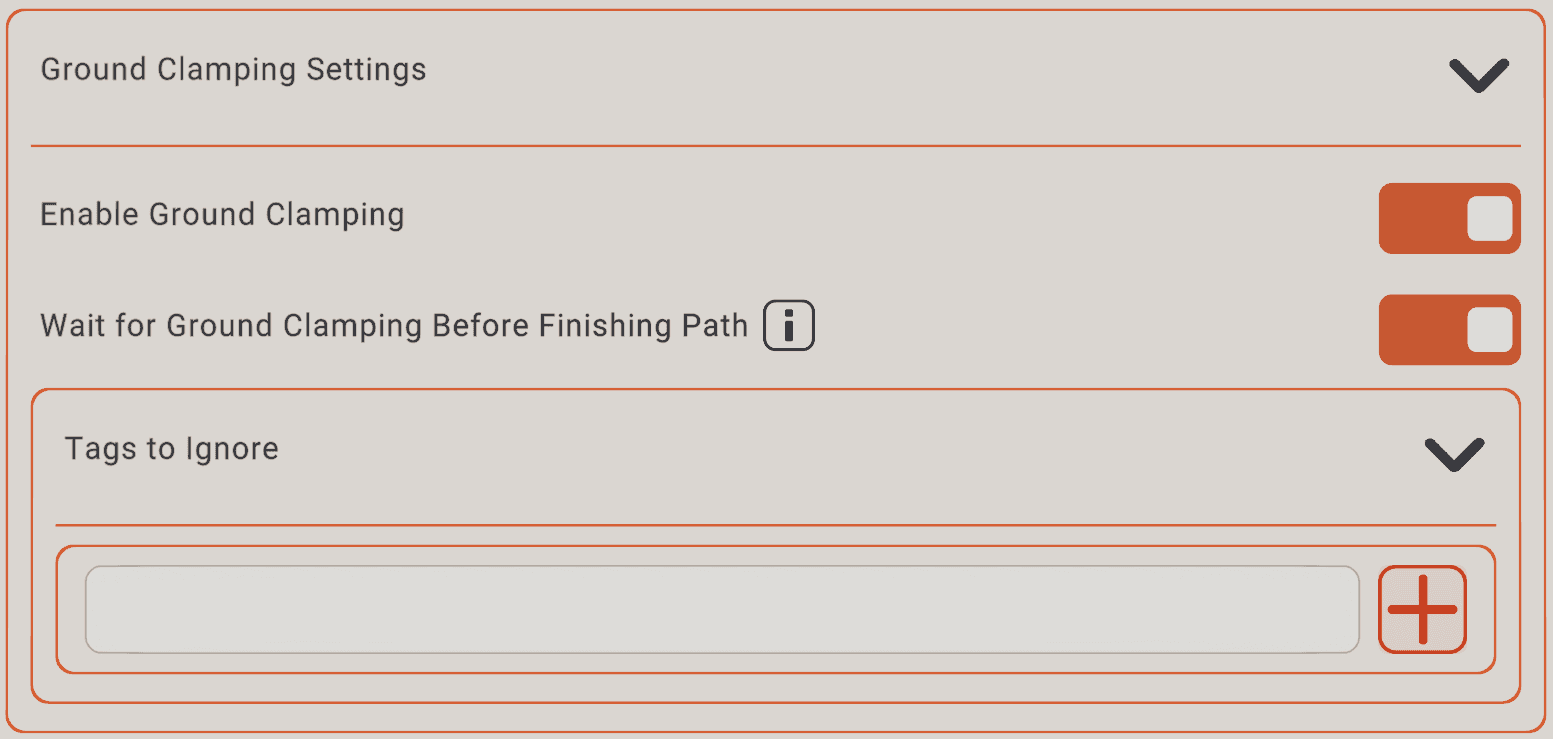
When you spawn in a Pathfinder and configure it, you’ll see settings for Ground Clamping enabled by default:
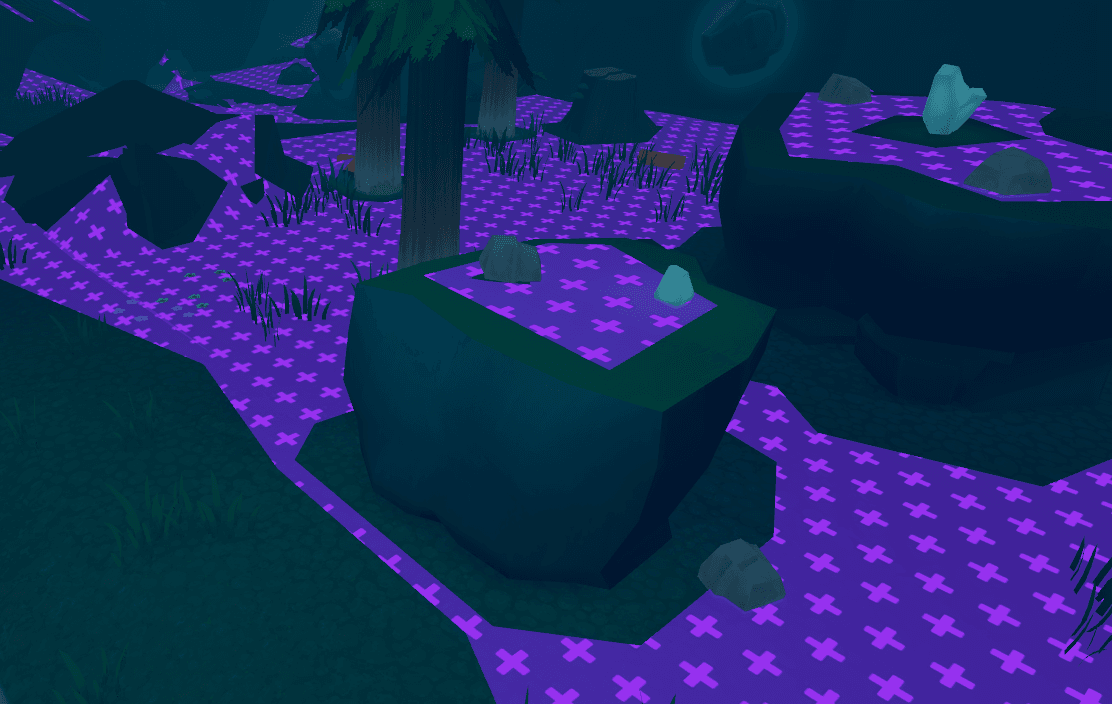
When you bake the navmesh in your room, the navmesh doesn’t actually align immediately to the terrain, but instead is more of an approximation. For example, take a look at the navmesh on this rock at the entrance to the Evergrown in My Little Monsters:
We found that if the pathfinder strictly followed the navmesh, your monster might float above the ground in some places and sink into the ground in others. To fix this, we added Ground Clamping, which makes it so that the pathfinder loosely follows the navmesh, but tries to snap its vertical position to the physical geometry of the scene. This lets your monster properly climb on top of this rock instead of walking through it.If you have objects, like a toy ball on the floor, that you don’t want included when finding the physical ground to clamp to, you can add their tags to the Tags to Ignore list in the configure menu.The second toggle setting, "Wait For Ground Clamping Before Finishing Path," typically doesn’t make a noticeable difference. To see its effect, place a pathfinder high in the air and have it navigate to a nearby spot on the navmesh. With the setting off, it will move diagonally down and stop once it reaches the correct horizontal position, even if it hasn't hit the ground yet. With the setting on, it will continue moving vertically until it reaches the ground.We find that generally these two settings should be always on, but if you need them off, you can either turn them off in the configure menu or you can use the Pathfinder Set Ground Clamping chip to disable the feature at runtime. For example, maybe you want to turn off clamping for your pathfinder while they are swimming in water, but turn it back on once your pathfinder leaves the water. Unless you have a specific reason to want ground clamping off, we recommend leaving it on.
When working on the Monster Sanctuary in My Little Monsters, we wanted players to freely decorate their space. However, it felt unrealistic when their monsters walked through user-placed decorations. At the time, we couldn’t do anything about this - we could only bake the navmesh as described above, but this wouldn’t help with dynamically placed obstacles.This led us to introduce a new component for making holes in the navmesh, though it is currently limited to Rec Room Studio. If you have Rec Room Studio access, you can use the Nav Mesh Cut component on any dynamic obstacle, and it will prevent the pathfinder from going through a specific area.
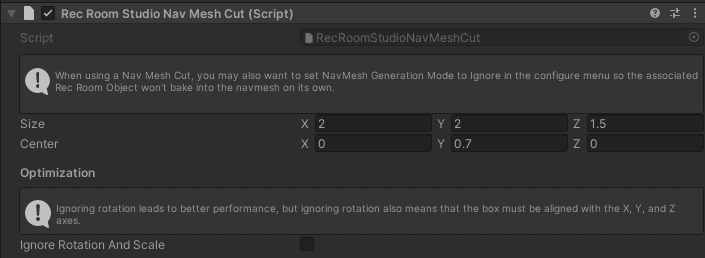
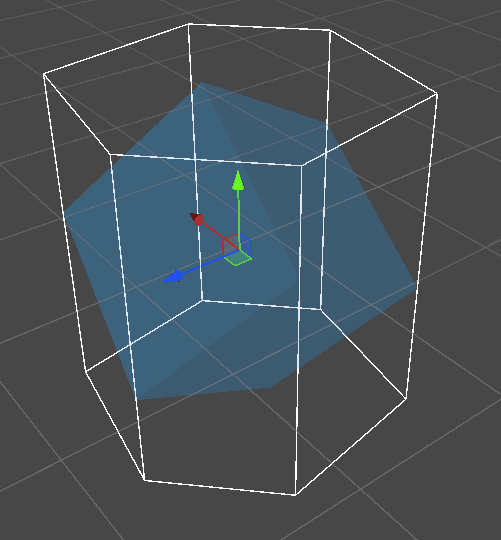
Please note the special behavior of the Nav Mesh Cut component when on a rotated Game Object - the translucent blue box represents the dimensions of the rotated Nav Mesh Cut component, but the white outline shows what actually gets cut from the navmesh.
There's one known issue with the Nav Mesh Cut component that creators should be aware of: if it fails to properly cut the navmesh for some reason, pathfinders might occasionally pass through it. This is rare and usually self-corrects if the Nav Mesh Cut moves enough to trigger a recalculation of the navmesh graph.When visualizing the navmesh in-game, you won't see the same level of detail on Nav Mesh Cuts as in Rec Room Studio. In fact, you won't see them at all unless you enable “Show Rec Room Studio Nav Mesh Cuts” in the NavMesh section of the room settings. With this setting enabled, the purple visualization plane from “Show in Room” will include cuts, but it won't update in real-time, as noted in the message below.
While we’d like creators to have the ability to set this kind of thing up in game with the maker pen as well, it is currently limited to Rec Room Studio.
Conclusion
The Pathfinder was one of many features that we implemented while working on My Little Monsters, but this tool isn’t just for us, it’s for you too. - Our goal is to give creators the tools to make the same rooms we make and all of the UGC tooling that we’ve made for My Little Monsters has now made it to your hands as well. The Pathfinder is still in beta though, so please let us know if you find any bugs with it!We know all of you have been looking forward to getting your hands on the Pathfinder for a while, so we’re excited to see what you can do with it! Together with the Replicator and the State Machine, it should be much easier now for creators to make AI friends (or enemies) of their own. To share your creations or ask for help on using the Pathfinder, feel free to check out the Rec Room Discord!

Other My Little Monster Tools!Take a look at the other new tools used to make My Little Monsters and learn how to use them in your very own rooms too!Read More!