
Function Definition Chips Are Out!June 11, 2024
The capability of circuits has become more robust, but more complex over time, making large scale reusable logic difficult to manage with high chip costs. Circuit Boards are great for organizing circuit graphs, but are tedious and expensive to duplicate in large numbers.That’s why we are introducing Functions (available both in Rooms 1.0 and Rooms 2.0), to enable complex custom logic that is easier and cheaper to create. This blog will explain how to use functions with examples, and where they can be useful.
What is a Function?
A Function is a reusable piece of custom logic that performs a specific task. You can create a function using a Function Definition chip and available chips in your Maker Pen palette. Once a function is defined, you can execute this function anywhere within the room using a single Call Function chip. So, using functions is like creating your own custom chip!
When creating complex rooms with large scale reusable logic, functions help with:
- Better organization: Grouping your custom logic chips in a single Function Definition makes it easier to manage all your circuit graphs
- Faster creation & iteration time at scale: Each function is defined in only one chip and can be edited in that same chip
- Lower cost(chip & memory) at scale: Functions defined in one place can be used with copies of single Call chip, rather than copying the original logic several times
- Easier Debugging: For all Call chips, the only source for an error is in the Function Definition
- Easier Collaboration: Co-creators can spawn a Call chip from their palette to use a function without locating the Function Definition chip to copy
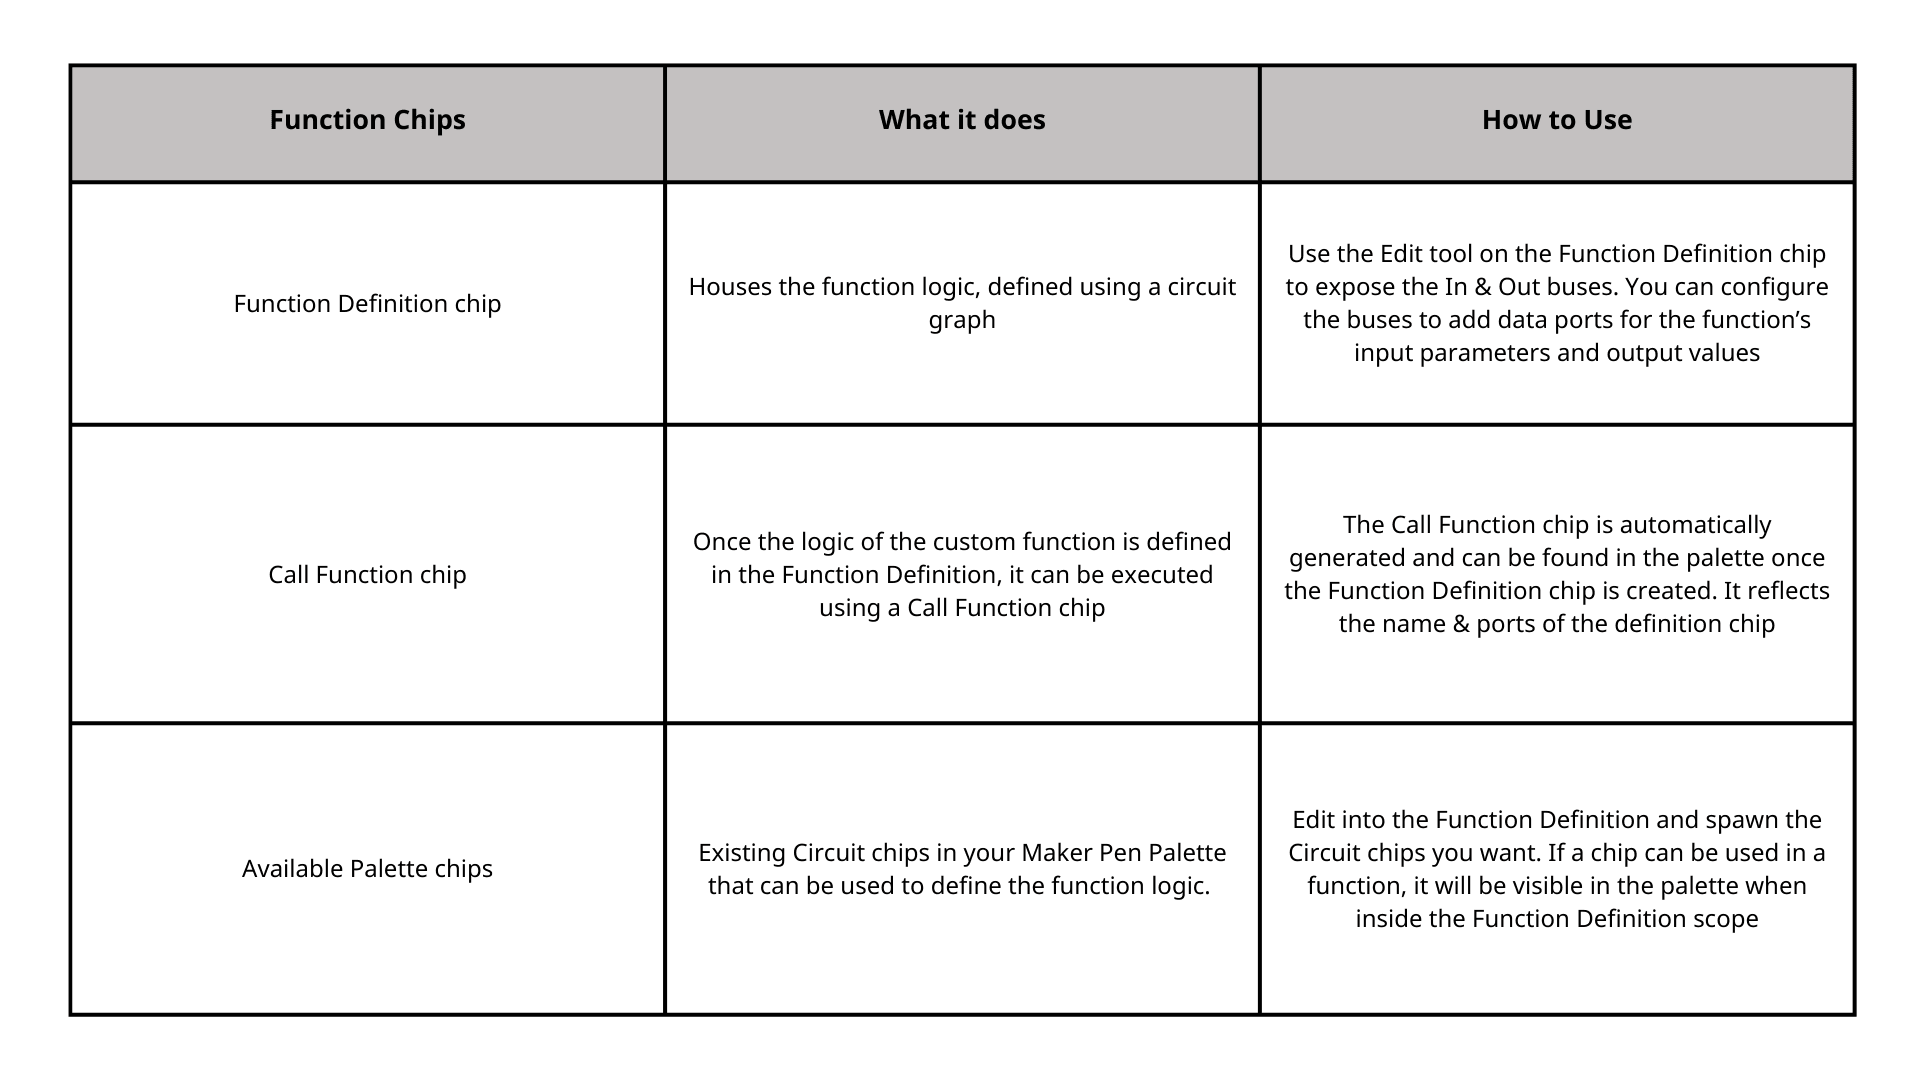
Function ChipsThese are the chips that can be used to Define and Call a Function:
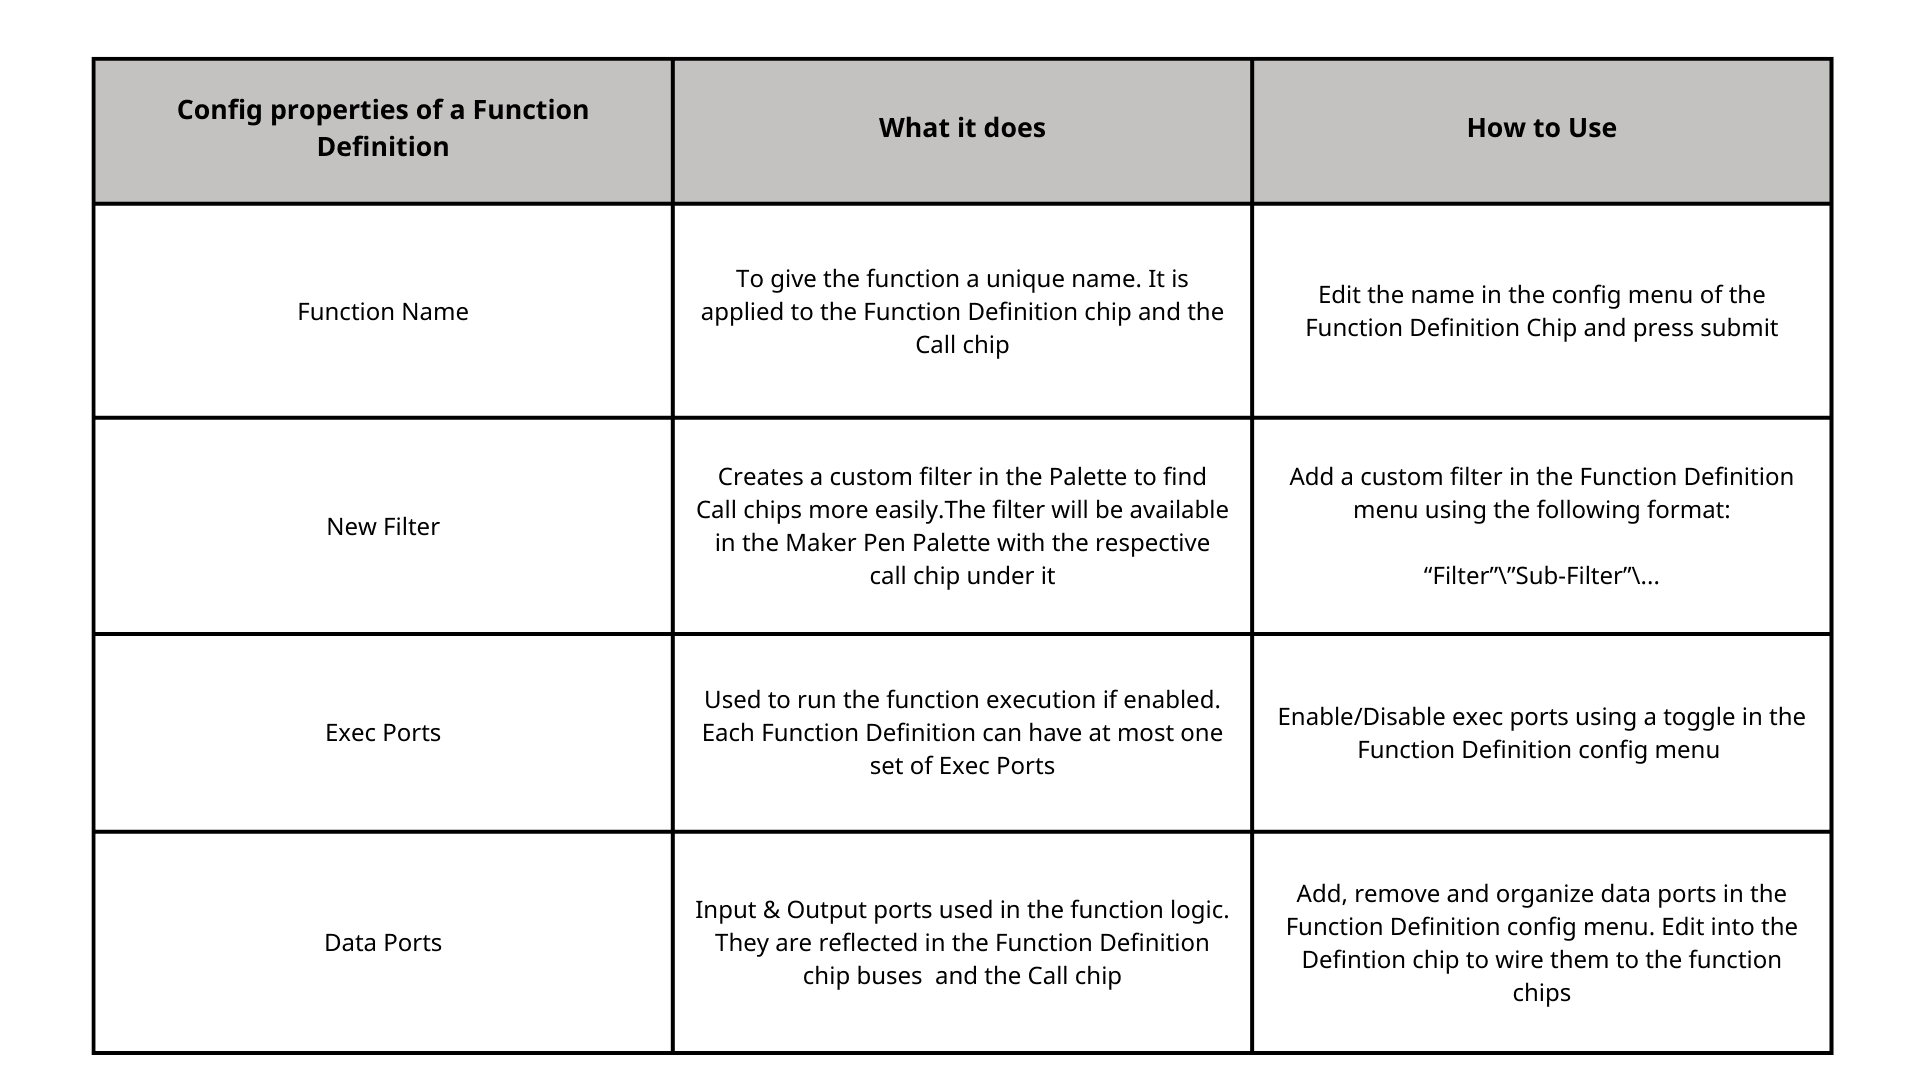
Configurable PropertiesThese are the customizable properties of a Function that can be modified in the Function Definition Config Menu:
So now that you know what chips are involved in creating a Function and what can be customized, let’s go into an example of using these together…
Creating a FunctionLet’s create a simple “intCube” chip that will take an integer value and calculate the cube of it using a function.
1. Spawn the Function Definition chip from your Maker Pen Palette and open the Config menu

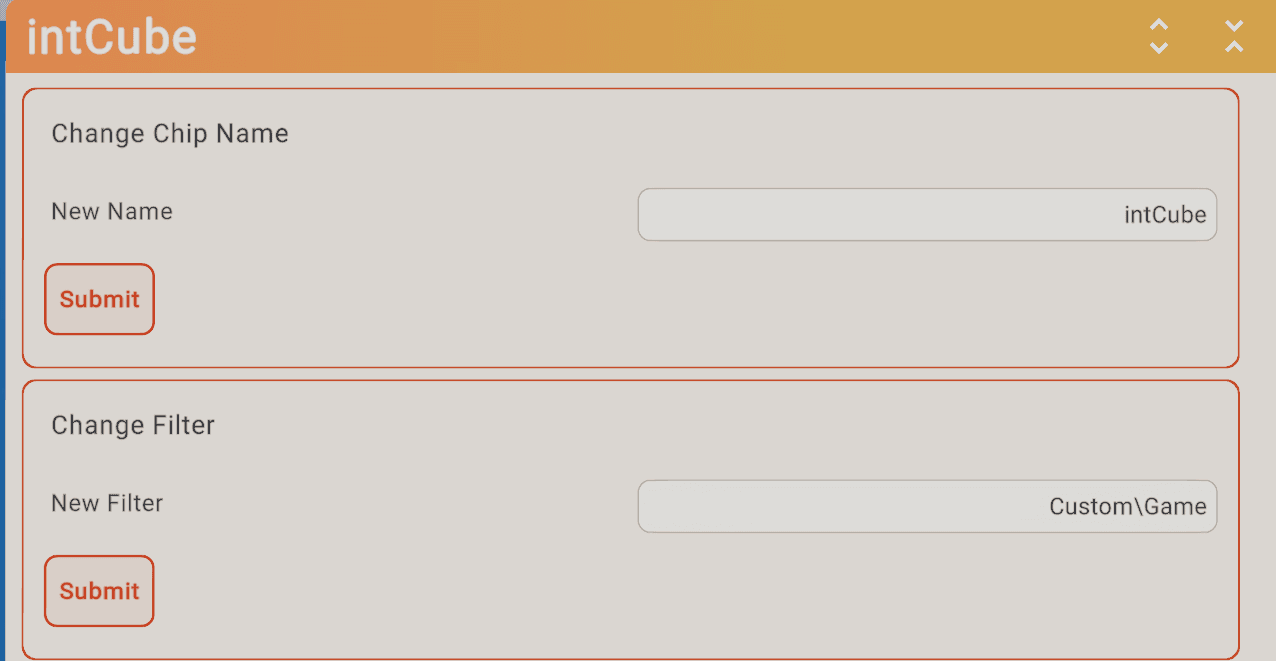
2. Rename the Function Definition to “intCube” and add it to a custom filter “Custom\Game”
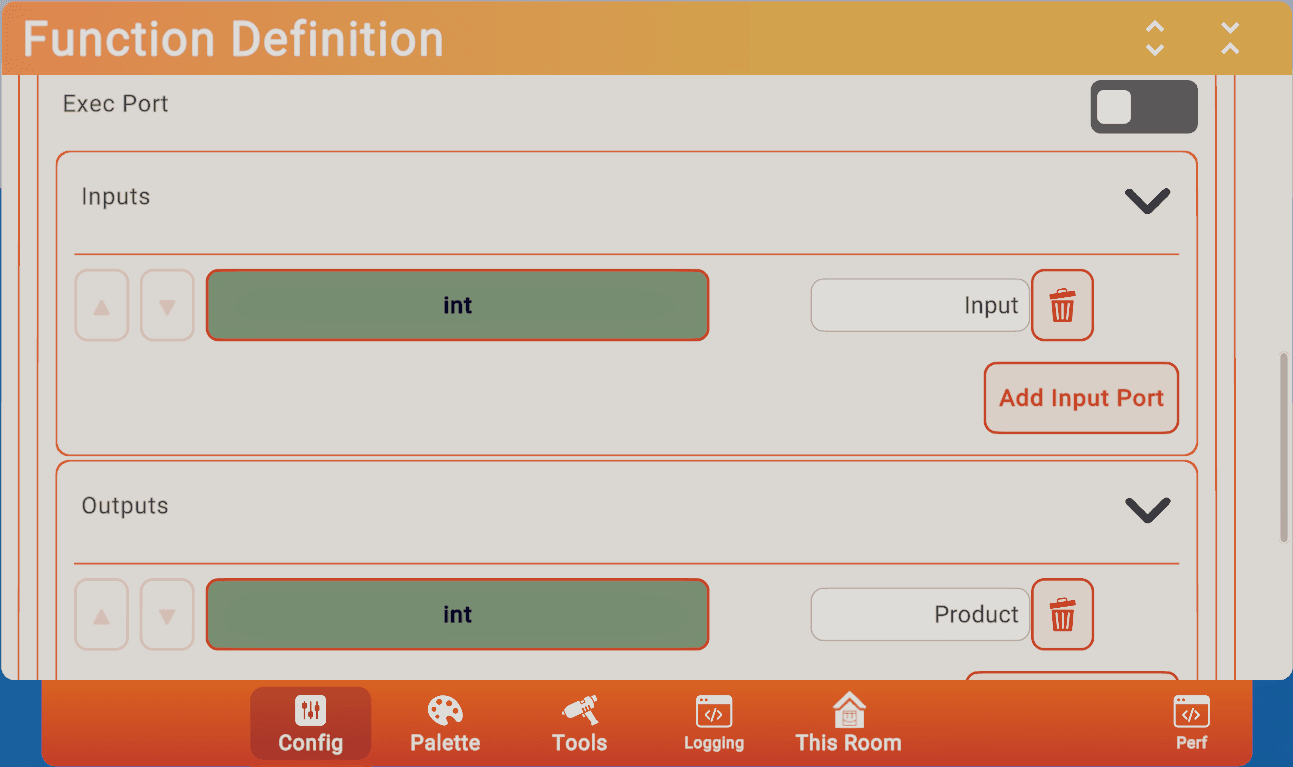
3. Add an Int input port “Value” and an Int output port “Product”4. Keep the Exec ports toggled off
5. The name change & ports that have been added will reflect on the definition chip

6. To define the function logic, use the Edit tool to edit into the Function Definition chip7. The ports we added are now shown on the In and Out Buses8. Spawn 2 multiply chips & wire them to calculate the cube of the input Value9. The final Multiply product wires to the input int port of the Out Bus
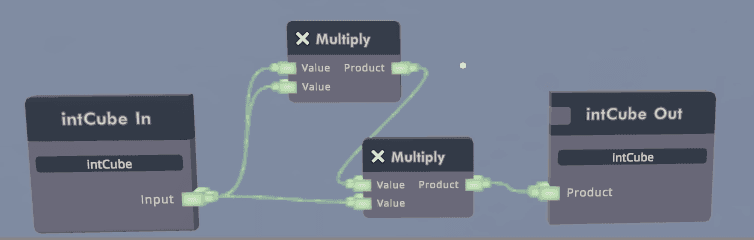
10. Edit Out of the Function Definition
11. The “Call intCube” chip has been automatically generated in the palette menu under the defined filter
11. The “Call intCube” chip has been automatically generated in the palette menu under the defined filter
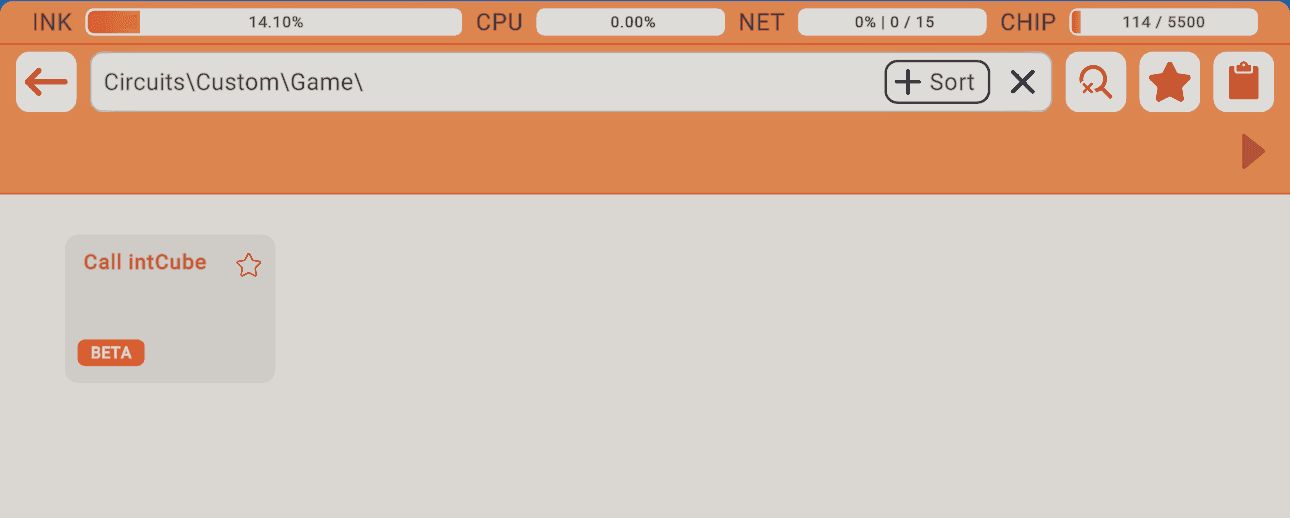
12. Spawn the Call Function chip
13. Input any integer value on the int input of the Call Function chip and the output will be a cube
13. Input any integer value on the int input of the Call Function chip and the output will be a cube
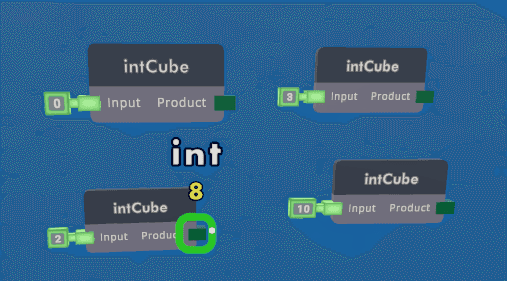
In this way we have created a new “intCube” chip using functions!
Using Exec Ports
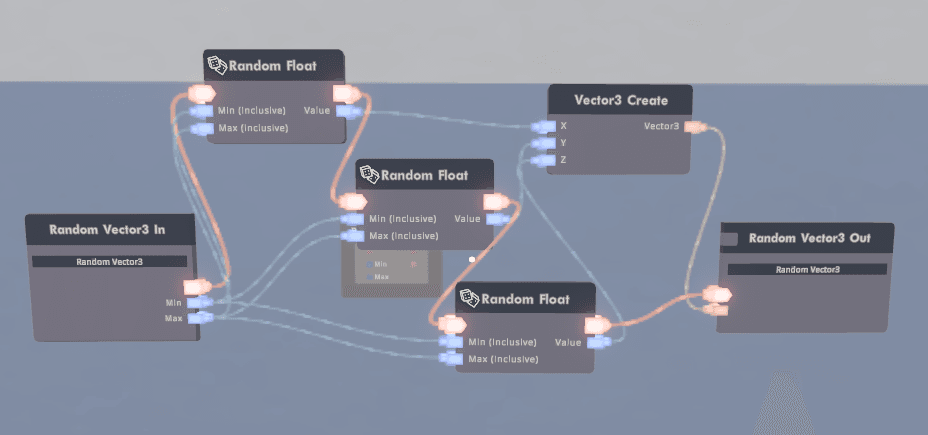
A function can have at most one set of exec ports, which means only one flow of execution can run through a given function. The execution wiring in a Function Definition must be completed, that is, the exec port on the In Bus must ultimately wire through chips to the exec port on the Out Bus.Let’s create a “Random Vector3” function with the graph shown below:
- Use 3 “Random Float” chips to get random X, Y & Z values for the result
- Vector3 Create uses those values to get the final Random Vector3 value
- The In Bus Exec port is connected to the the first Random Float chip
- Once that completes execution, it executes the next two Random Float chips
- The Exec output of the last Random Float chip finally connects to the Out Bus Exec port, completing the flow of execution
To get the desired Random Vector3 output value, the Call chip must be executed. When a function requires execution, its output values will not be updated until the execution is complete.
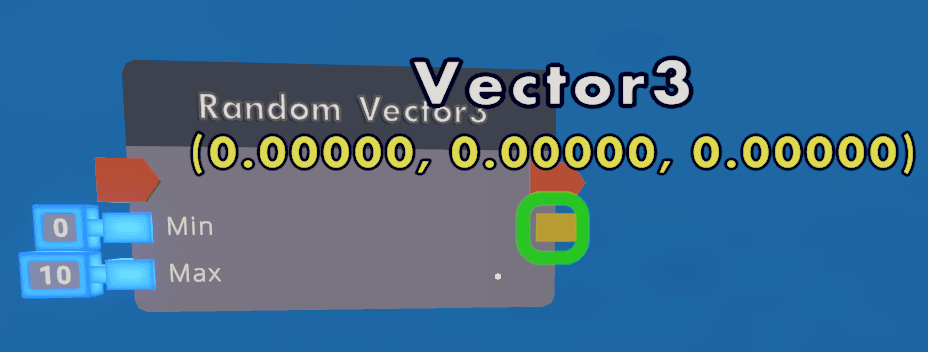
Before Executing
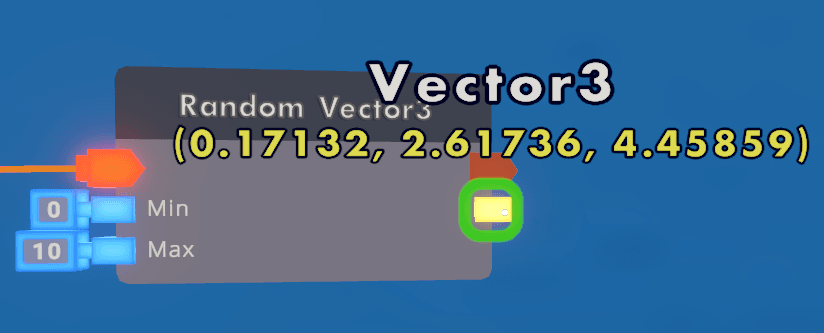
After Executing
How are Functions Useful
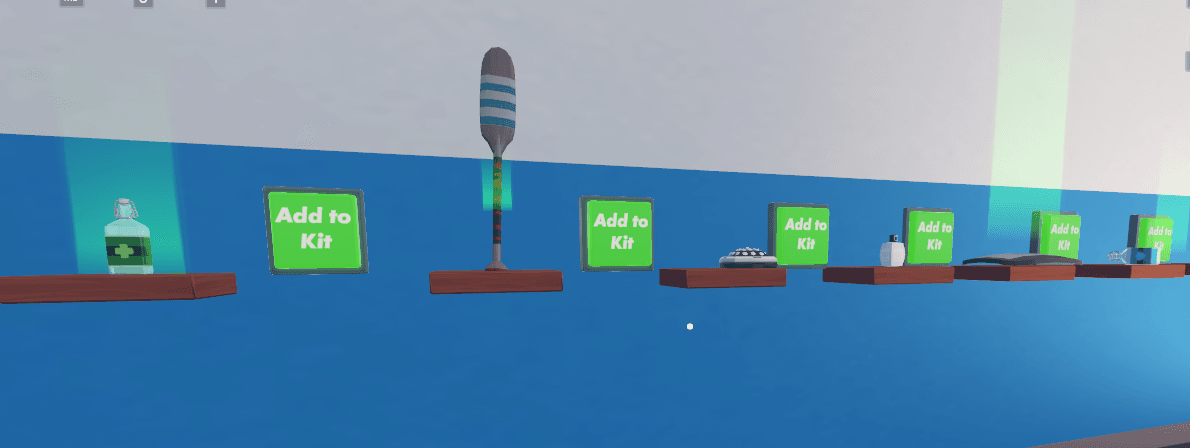
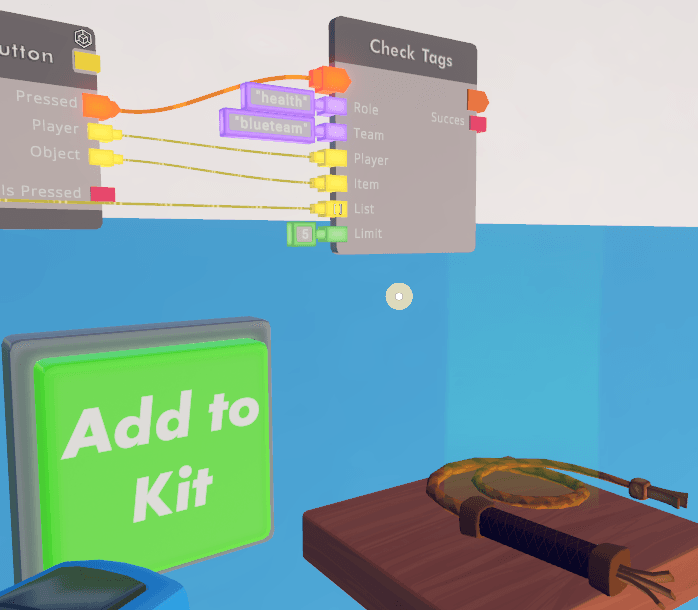
Let’s take a look at a more complex example in order to see how Functions can save us both time and chips. Let’s say we’re building a PvP game, and there are 20 items that players can choose to add to their “kit”. We’ll put a button beside each one. When a player presses a button, we should add that item to a list… but only if the player has the appropriate “role” tag, and the item has the corresponding player’s “team” tag.
Without Functions (120 chips)
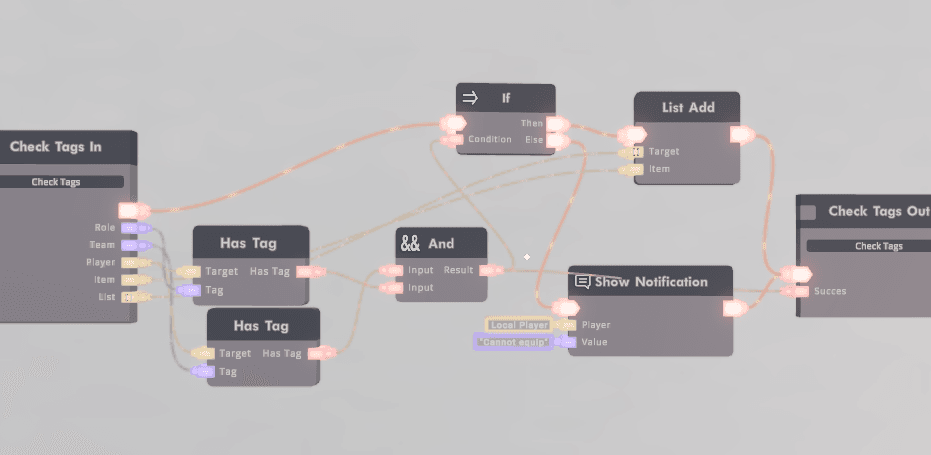
First, let’s see how we’d build this without functions. We’ll start by setting up the logic for just one of those objects. When the button is pressed, we’ll check whether the player and the item have the correct tags. If they do, we’ll add the item to our list. If not, we’ll show a notification telling the player that they can’t equip it. Here’s what that looks like:
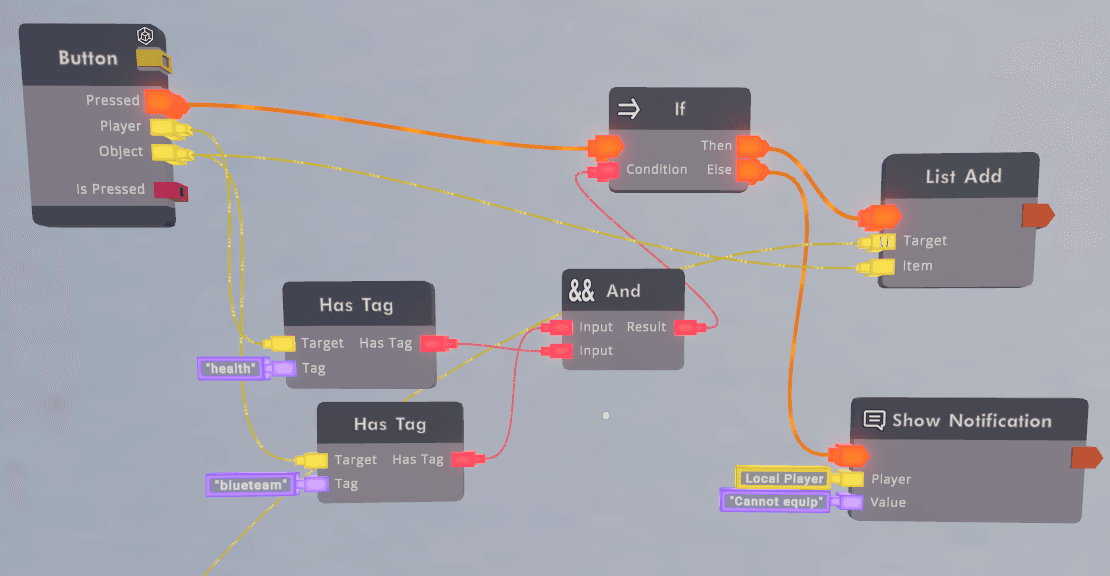
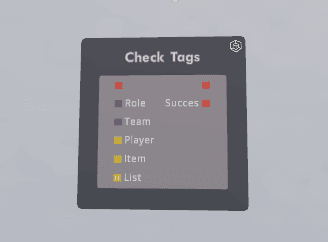
Checking for player tag “health” and item tag “blue team”
Excluding the button’s object board, this took 6 chips. Now, in order to do this same thing with all 20 items, we’ll need to copy this graph 19 times for a total of 120 chips!
With Functions (29 chips)
Now let’s try this with a Function Definition:
- Spawn the Function Definition and add the necessary ports to it in the Config menu
2. We’ll copy our logic from before, but this time inside the function definition
Inside the Function definition
3. This generates a Call Check Tags chip in the palette we can spawn4. Now, setting up the logic for each of our items is as simple as hooking up the button’s object board to a Call Check Tags chip!5. Role and Team inputs can be customized for each Call Check Tags chip
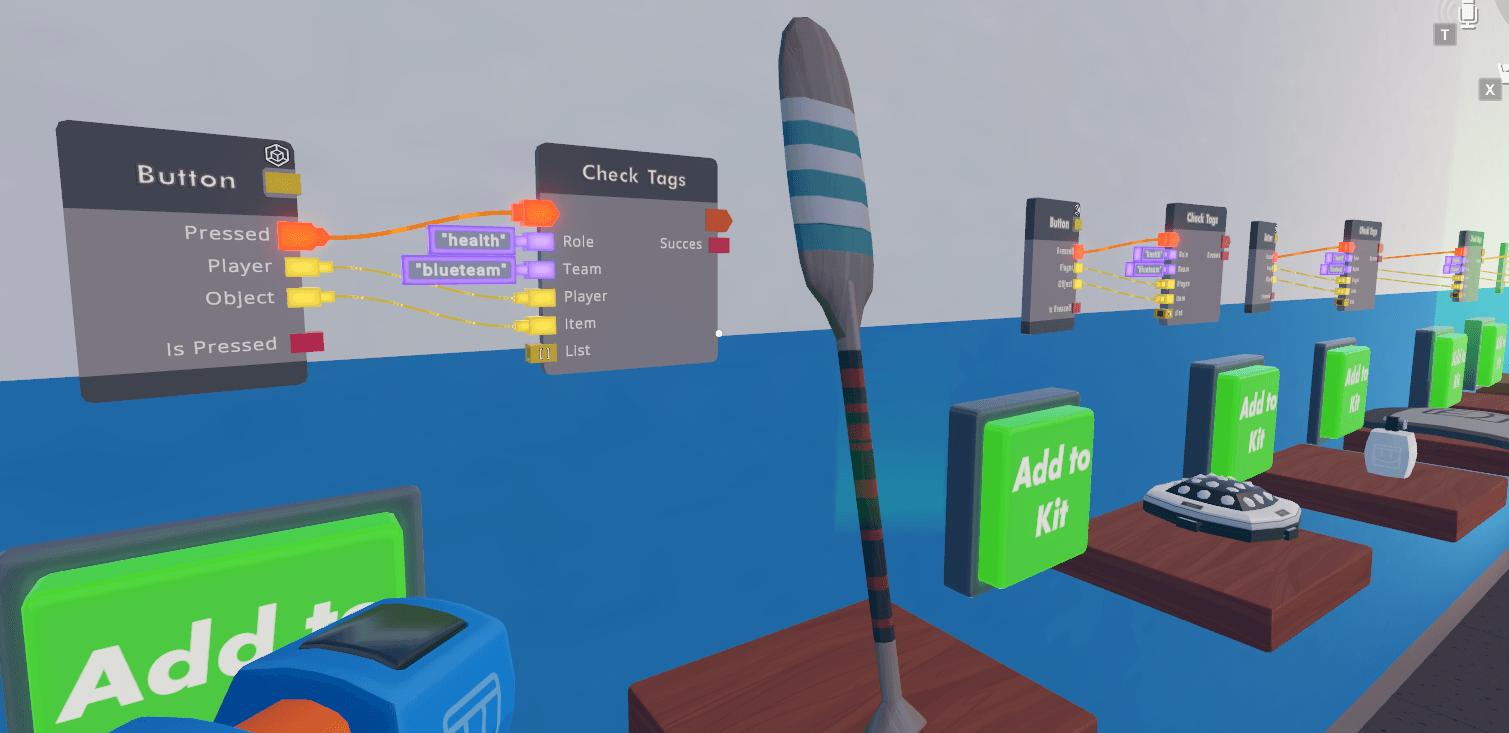
Copies of Call Check Tags wired to Buttons
This approach uses only 29 chips! (20 call chips + 1 Function Definition + 2 In/Out Buses + 6 chips for the function logic)
Iteration
Now let’s say we want to make a change to our “Check Tags” logic. We want to limit the number of items you can have in your kit. We can do that by adding two more chips - “List Get Count” and “Less Than”.
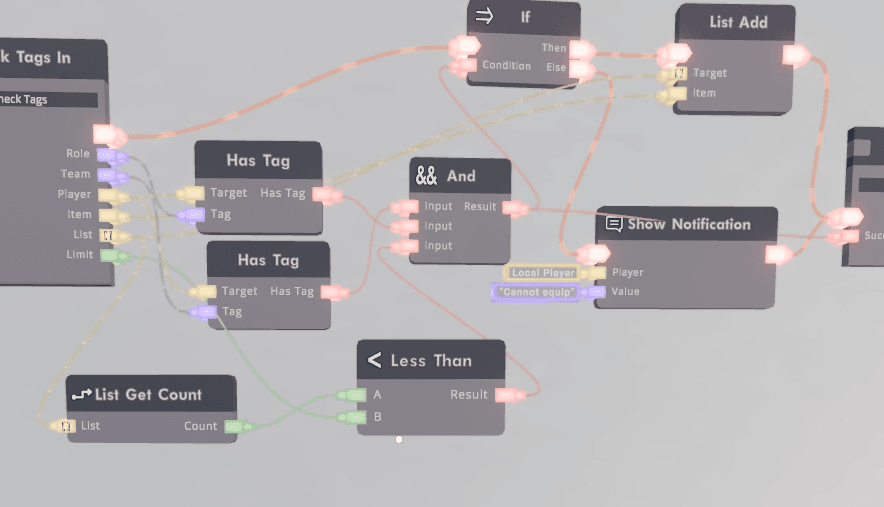
New chips: “List Get Count” and “Less Than”
But if we had built our system without Functions, we now have to delete the other 19 copies of our logic, and copy-paste the new one 19 times - how annoying!Since we’ve used Functions, we can make that change just once, inside the definition for the “Check Tags” function. We don’t need to touch any of the Call chips. Easy! (And as a bonus, we’ve only added 2 chips to our room, instead of 40).
Collaboration
Suppose a co-creator wanted to add a bonus item to the room for players to choose from, but you have organized all the chips away from the items.Without functions, they would have to locate the original graph in the room to copy it. This may take a while, If they don’t know where it is. With functions, they can just spawn another Call chip from their palette, and wire it to a Button as shown below.
New Item
Now you can also use functions to reuse logic, reduce chip cost and creation time, for easier collaboration & debugging!
Available Palette ChipsIn the initial release of Functions, creators will have access to 700+ chips to use inside Function Definitions. With time, that list may grow, and we want to ensure that as Functions improve over time, they can be fully utilized to build complex rooms more easily and at a lower cost. Below is an updated list of chips that cannot be used inside a Function Definition. Are there any chips you like that don’t work in Functions yet? Let us know in our Discord channel #Function Definition Chips!